
User Guide
4 Steps to Use iSwingMate
1. Add Swing Video to iSwingMate
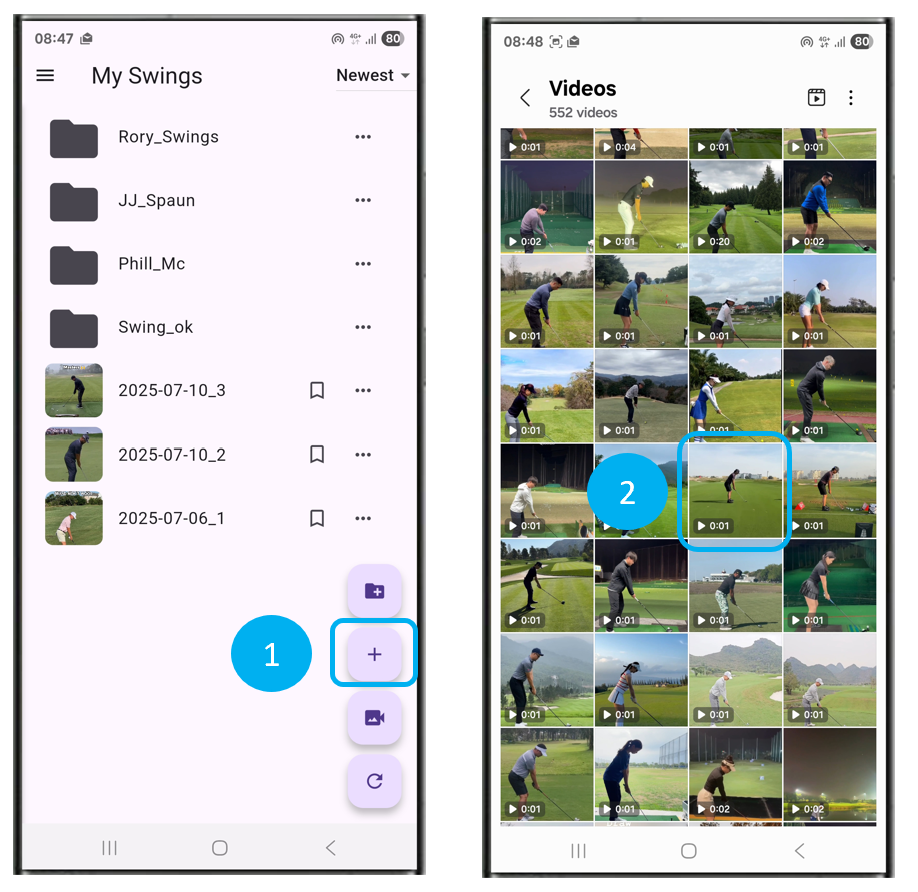
– Method 1: Add an existing swing video from Photo Library
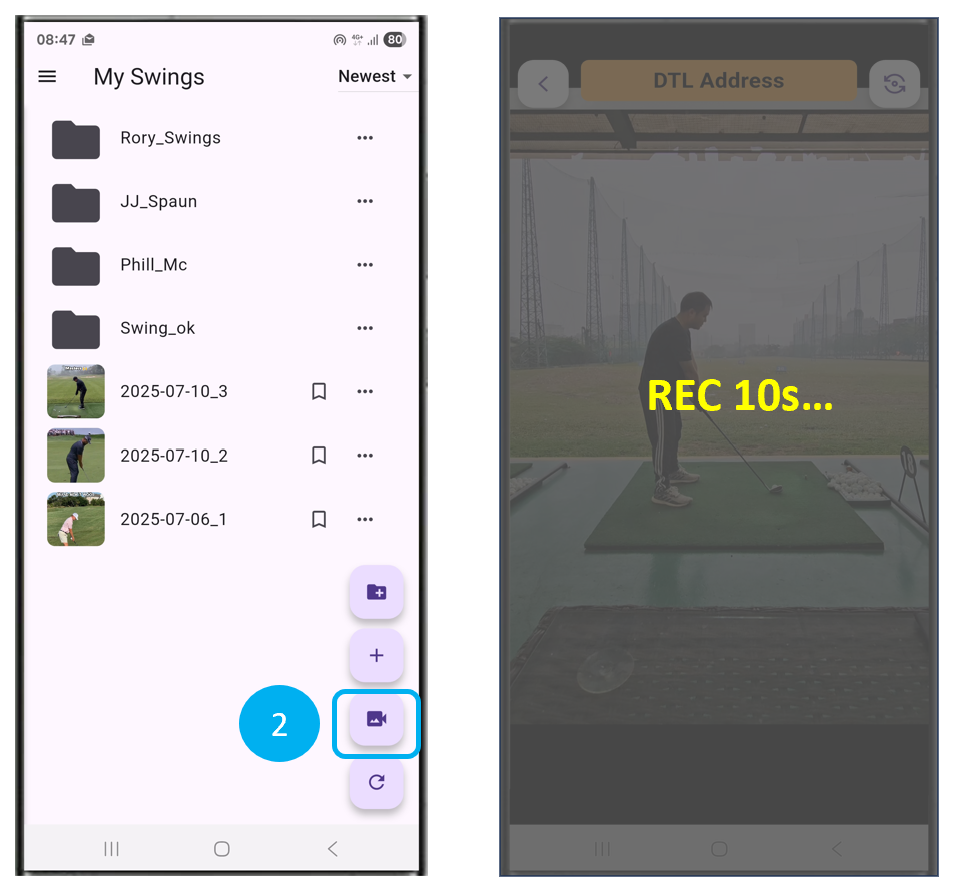
– Method 2: Record your swing video
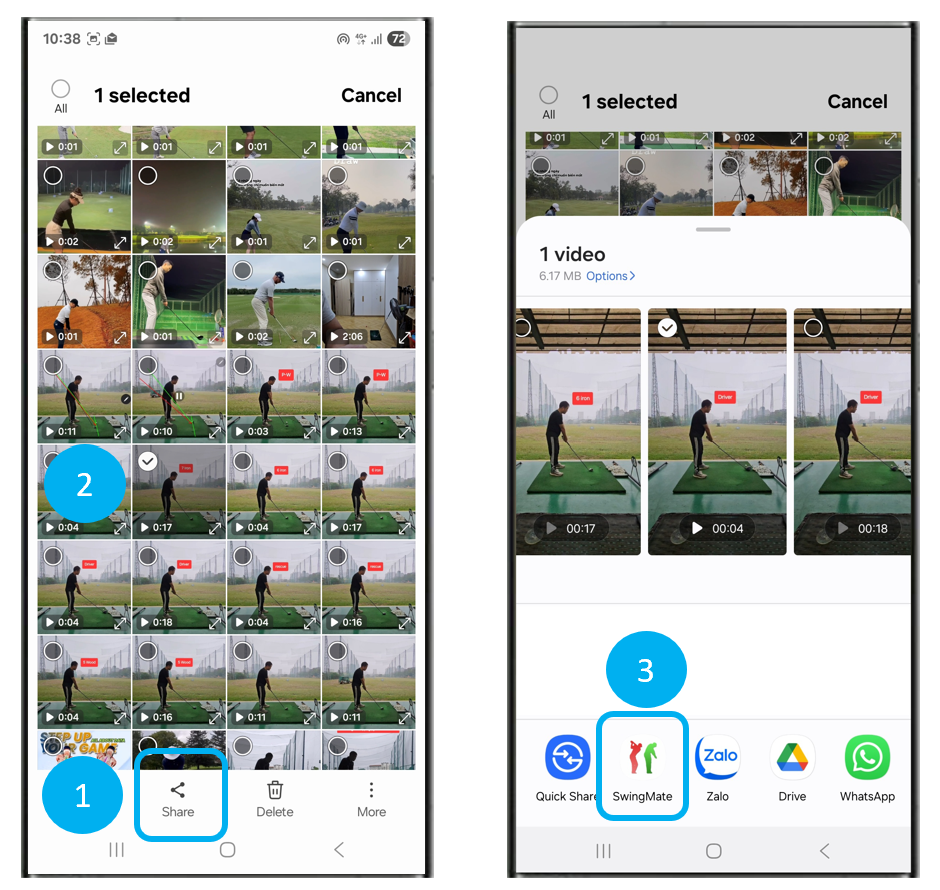
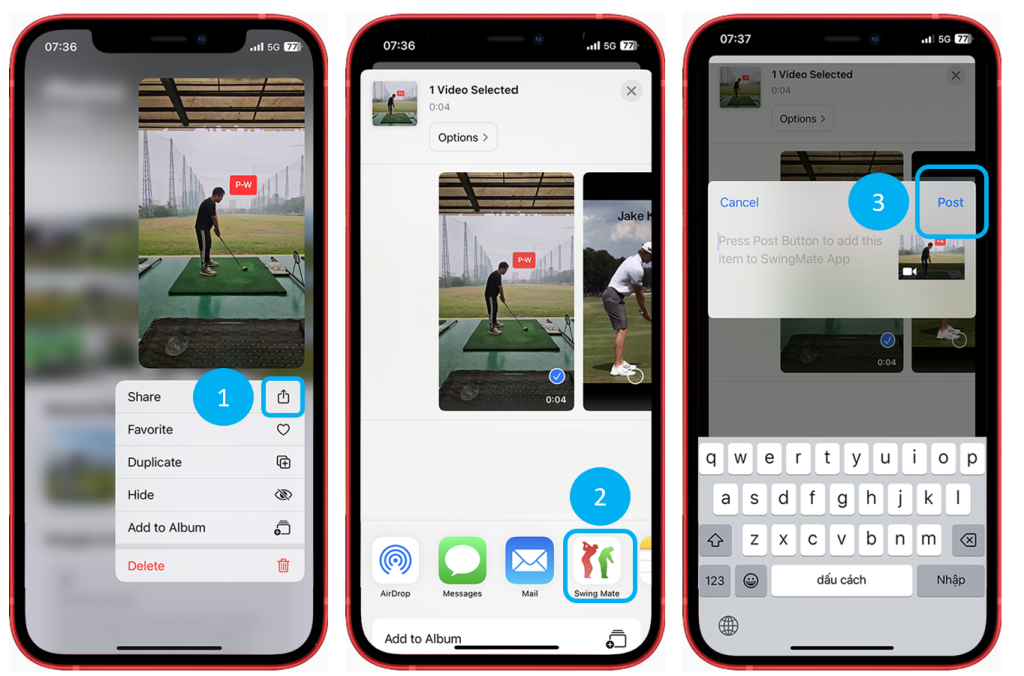
– Method 3: Share video to iSwingMate
2. Save Swing Profile
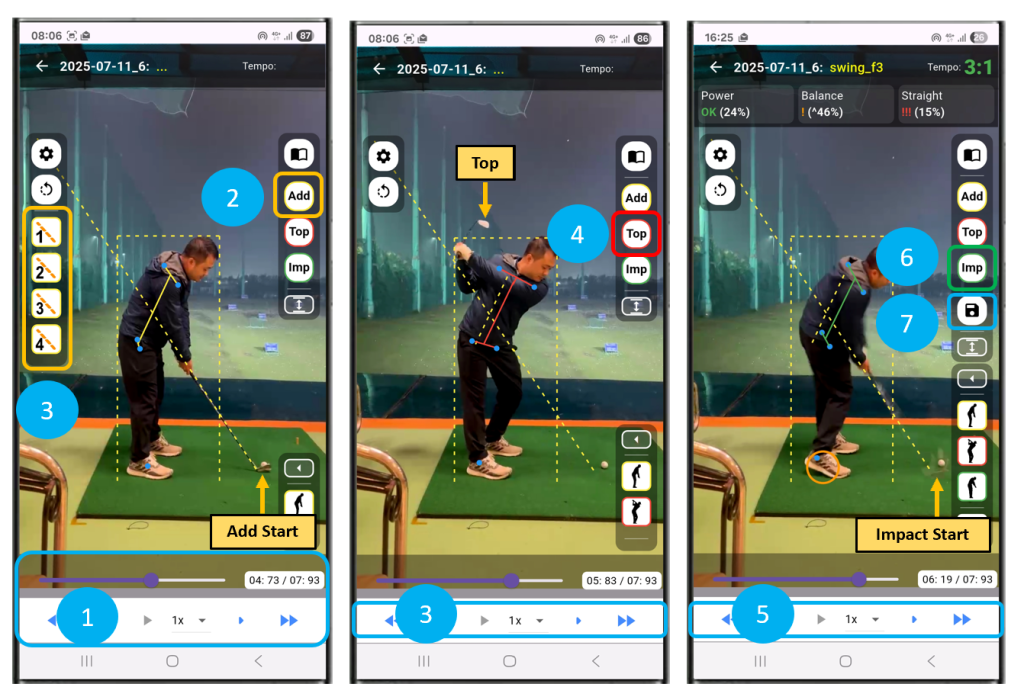
– Step 1: Use the video seeker tool to jump to the correct Address position..
- Note: Choose the moment right before the club starts moving. Swing Tempo accuracy depends on selecting this exact moment.
– Step 2: Press “Add” to mark the Address position
- After the Shaft-Line is generated, you can use buttons “1, 2, 3, 4” to adjust it if needed.
– Step 3: Use frame-by-frame scrub to find the correct Top position (Top of backswing).
- Note: Choose the moment when the clubhead reaches the top of the backswing. Tempo accuracy depends on this choice.
– Step 4: Press “Top” to mark the Top position
– Step 5: Use frame-by-frame scrub to find the correct Impact position.
- Note: Choose the moment when the shaft is closest to the Impact moment..
– Step 6: Press “Imp” to mark the Impact moment
– Step 7: Press “Save” to store the Swing Profile
3. View Saved Swing Profile
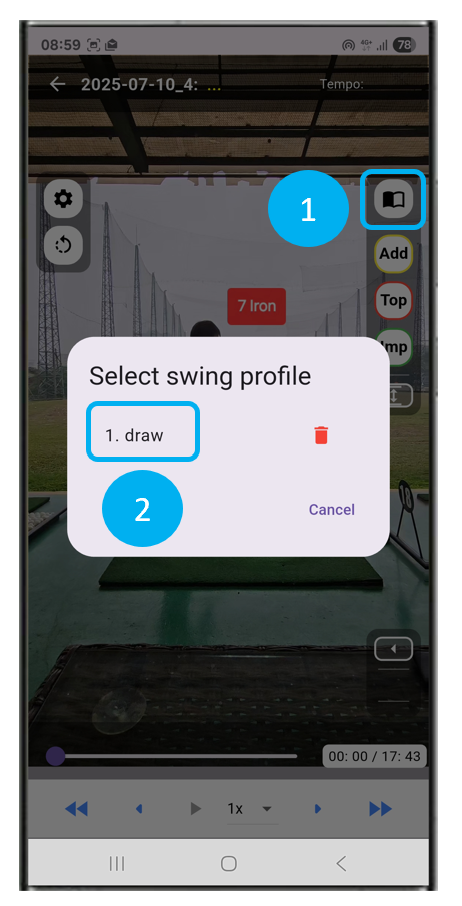
– Step 1: Press “Load” to open the list of Swing Profiles in the video.
- One video may contain multiple swings.
– Step 2: Select a profile to view swing data and issues.
4. Compare Swing Data

– Step 1: After opening a swing profile, press “Compare” to show the list of saved swings.
- Note: The list only shows marked swings in the video.
– Step 2: Select a swing profile to compare